
Magnets, Mordheim, and Managing My Expectations… | TWiHD - Week 25
Magnets and Model Mayhem
It doesn’t feel like two minutes since I was scrambling to get the last one out — and that one had to cover two weeks. No such luck this time. It’s been a week packed with productivity… just not so much dice.

The fully magnetized Slave Ogryn gang, ready for safe transport to the Underhive.
Magnets have been added to more models and the pile of cardboard boxes in the dining room/office/recording studio/painting desk (don’t worry, they’re all the same space…) is looking smaller.

It felt rude to not get an up to date photo…
Reaffirming my magnet choices, I tackled some of the trickier Necromunda bases from GW — all varying in thickness — but the mix of sizes I’ve been using held up well. The Slave Ogryn gang is now fully magnetized, boxed, and ready for the next project.

Magnetizing Necromunda bases: using stacked magnets for better grip on variable base thicknesses.
Digital Dice Rolls with Mordheim
The next gang isn’t really a gang — more of a warband — and since our kids like to eat at the kitchen table, this one’s been entirely digital. I’ve been diving back into Mordheim: City of the Damned on the Steam Deck.
Honestly, it’s been a godsend while hayfever (or maybe a cold?) has knocked me sideways this week. Being able to grab something Warhammer-adjacent for a quick 10-minute session — or a longer one if the house is quiet — has been great.
If you haven’t played it, Mordheim: City of the Damned is basically a grimy, X-Com style tactics game. You build up a warband, level up your fighters, loot better gear, and play out brutal turn-based missions in the ruins of the city.

Digital dice rolling on the go — Mordheim: City of the Damned runs great on the Steam Deck.
That undersells it a bit, but I’ll save the full review for another time. My Witch Hunter warband has been alternating between righteous smiting and missing three 95% attacks in a row — which led to a total collapse after the enemy warband spawned on top of my archers and charged my Warrior Priest before I even activated. (I’m not salty. You’re salty.)
Still, it holds up nicely. Great atmosphere, punishing mechanics, and enough nostalgia to keep me hooked. I’ll purge the City of the Damned of its chaos worshippers, vile ratmen, and blood-sucking vampires in no time.
Back in Action: First Game of Shatterpoint
Fortunately, it’s not all doom and Wyrdstone-induced gloom. I actually got a full game of Star Wars: Shatterpoint in — my first in almost two years — and it felt great to shake off the rust.
My Strike Team
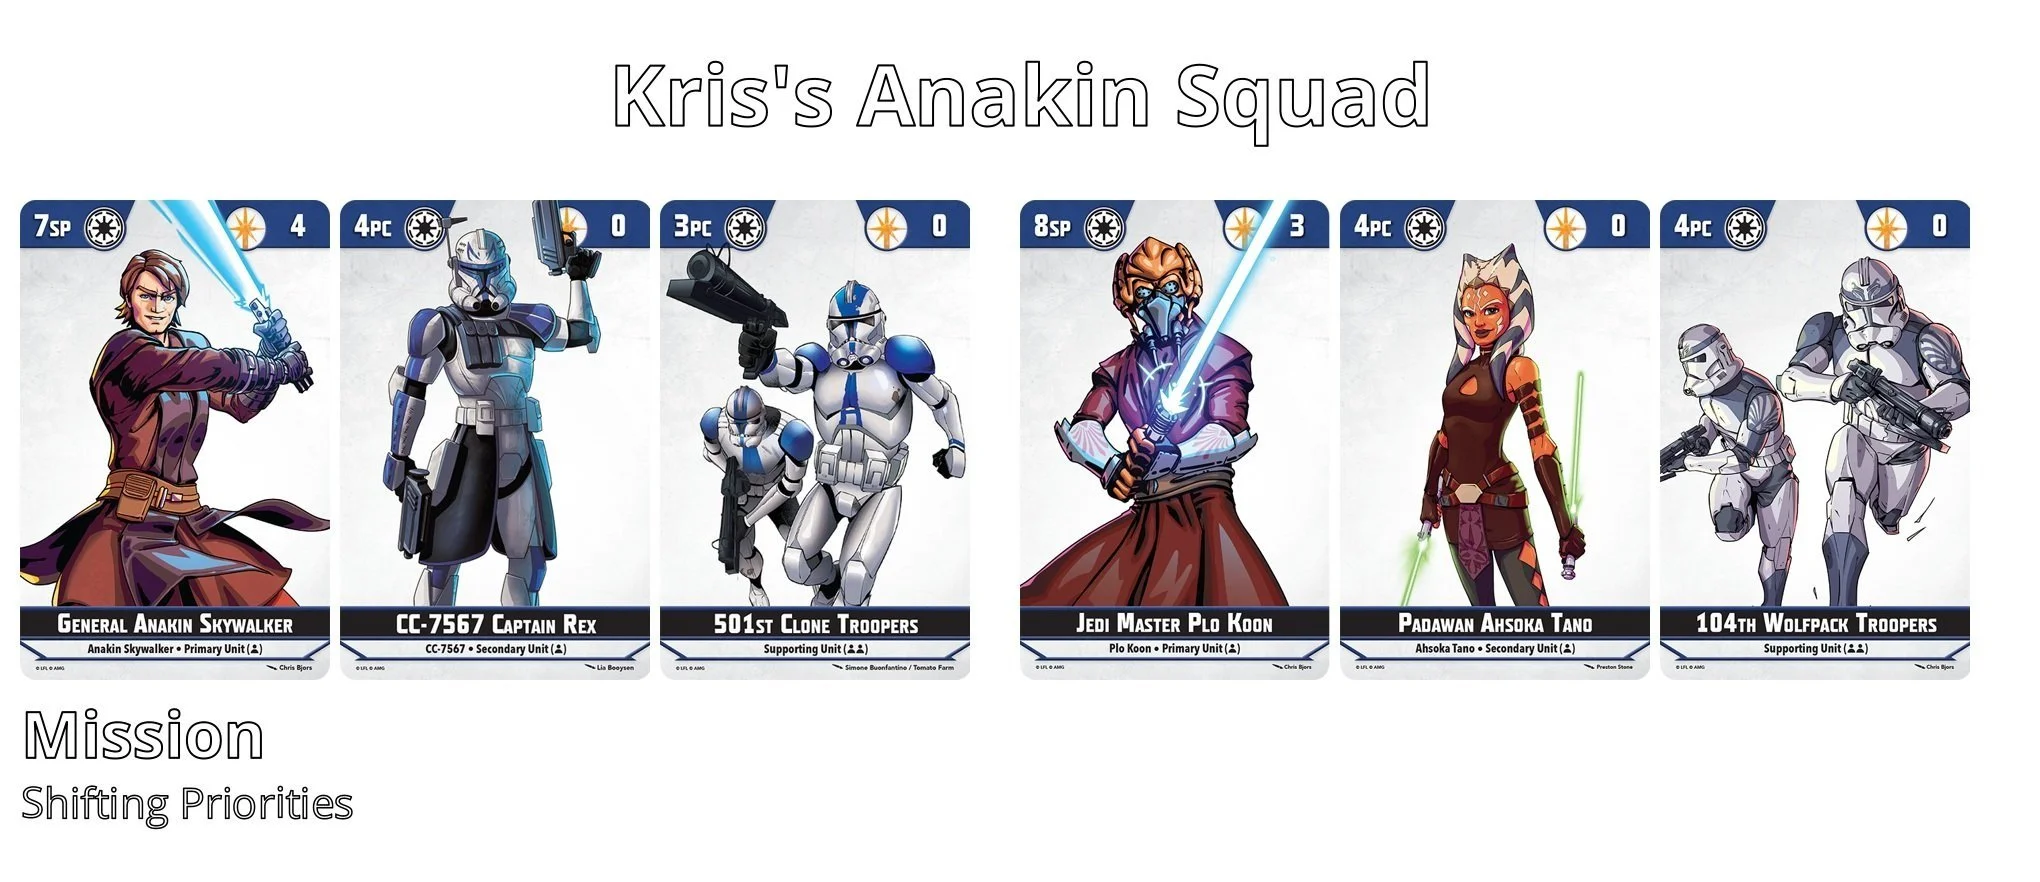
Kris’s strike team for Shifting Priorities — a Jedi-heavy Galactic Republic list featuring Anakin, Ahsoka, Plo, and clones.
Matt’s Mandalorian Strike Team
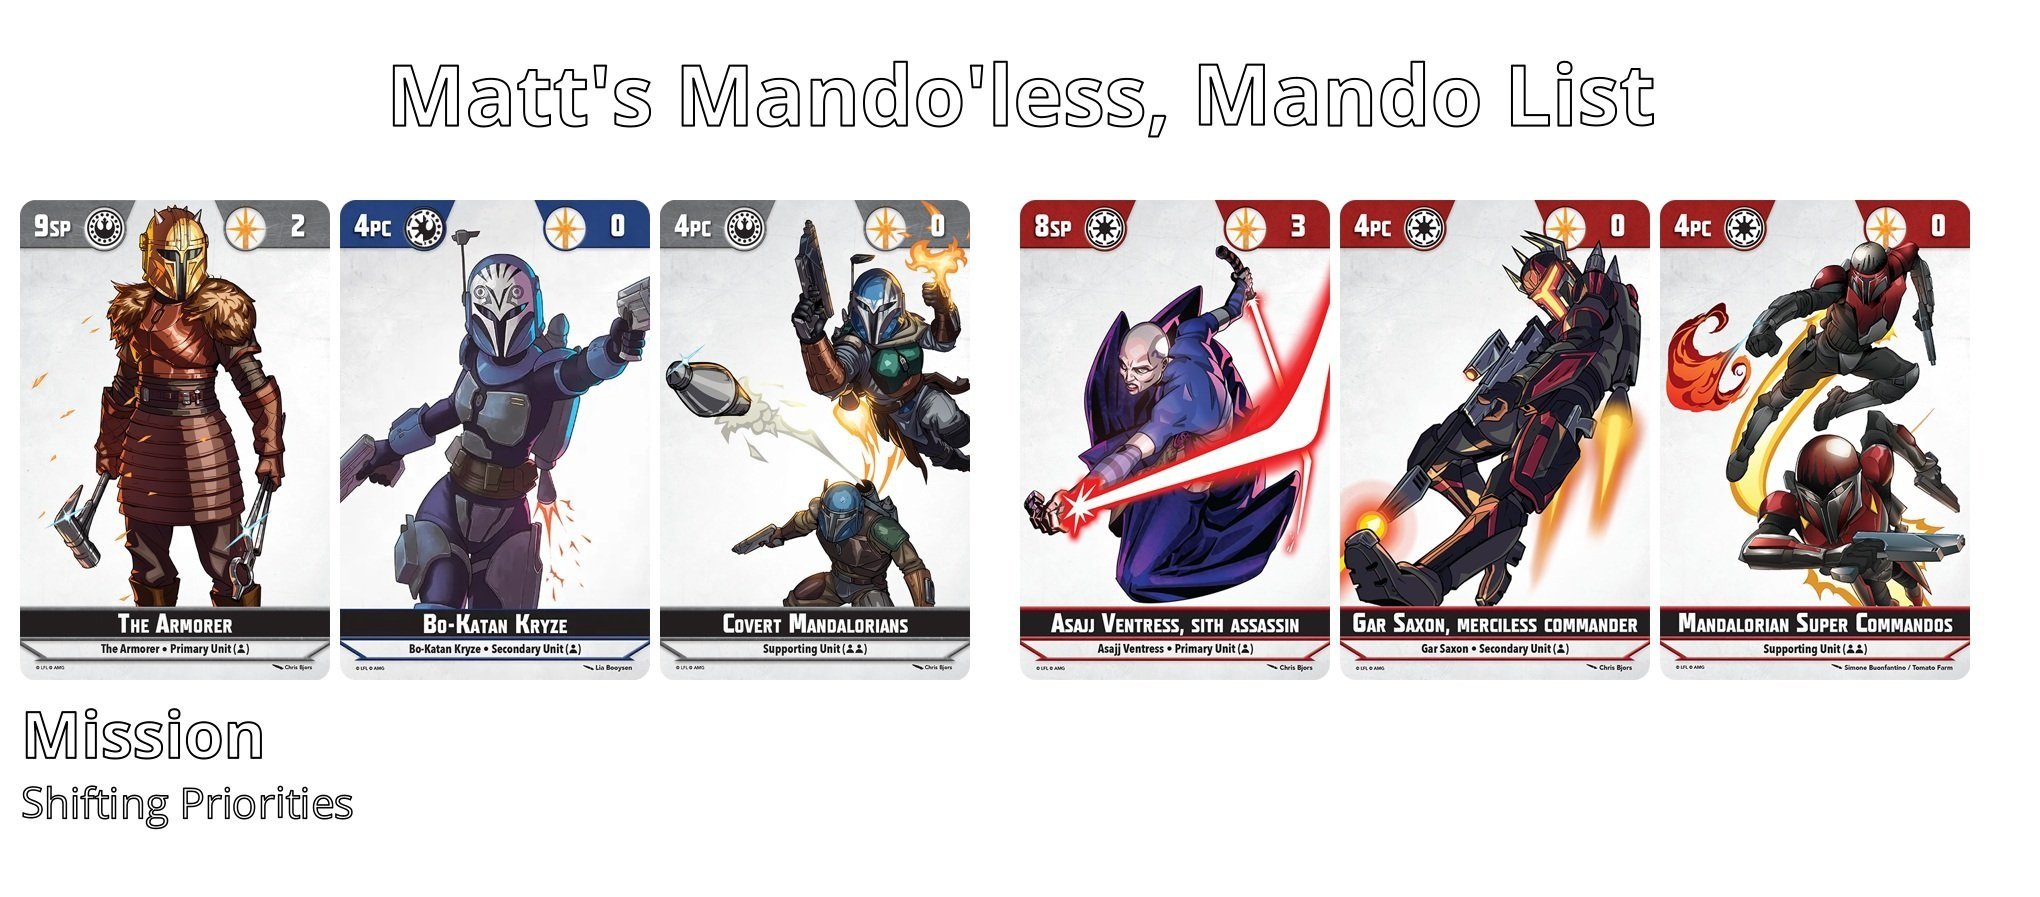
Matt’s aggressive, Mandalorian-flavoured strike team combining The Armorer, Bo-Katan, Ventress, and Gar Saxon.
We played the Shifting Priorities Mission Pack, since it’s the one I’m most familiar with. Struggle One started off rough: I had Priority, but flipping Anakin immediately meant putting him in reserve — a Force point down straight away. I then flipped Plo and pushed him up the board to contest the center point (which was active).
Unfortunately, I got too clever trying to keep him perfectly centered. Result? Out of range of my supports when they got shot, and it felt like I didn’t use him well at all.
That theme ran through most of the game — plans made, then plans punished. The Mandalorians tanked my attacks and capitalized on every misstep. Struggle One ended in a close loss after both of us churned through our decks. Since we were playing slow (my rust was showing), we jumped into Mission Critical for Struggle Two to keep things moving.
Momentum Swings and Missed Shots
Struggle Two flipped fast. I got the perfect early activation of Anakin, with him wounding the Mandalorian Covenant and Bo-Katan in a single go — giving me a host of Momentum, keeping me topped up on Force, and securing a Priority Objective for a huge early swing.
It was so fast that Struggle Two was effectively over before much else happened — we barely got through four activations before I tied up the game.
Struggle Three was the reversal. Anakin was already activated, and I had moved my forces based on Struggle Two positioning. But I had too many Wounded units and not enough presence in the right places. I was dead drawing, hoping to hit my Shatterpoint and trigger Anakin’s second activation, but Matt closed it out cleanly and took the win.
Post-Game Reflection: Anakin Delivers
I learned a lot and feel way more comfortable with how Star Wars: Shatterpoint flows — the questions it asks, and where I need to sharpen up. I still don’t fully speak “Shatterpoint” yet (some of the symbols still trip me up), but I’m getting there.


General Anakin Skywalker proved to be everything you’d expect from the Chosen One. His Form V Djem So stance brings serious heat — up to 10 damage on the tree, late repositioning, and even a Ranged 4 attack. Flip to Form V Shien and you get early movement tech — Recover, Push, and more control options — while still dishing out a solid 8 damage. It’s the kind of versatility that lets you flex between aggression and setup without feeling like a passenger on the struggle track.
Force economy was a real concern in this list, which is where This is Where the Fun Begins came into play constantly — letting me recover points to stay in the game and fund my frequent use of I’m Going to End This. That ability is pricey, but when it lands?
Absolutely worth it.
What’s Next
I’ve got plans for more Star Wars: Shatterpoint content soon — including ideas for a new table build, which should lead to some nice photos!
If you want to go back to the start of my re-entry into Shatterpoint, you can read about my Demo Game at UKGE here.
Or if you want to see what got the old noodle turning trying to plan out this Anakin list, the highlights of the recent 2025 rebalance are here.
I’d love to know what you’re playing — and if you enjoy Shatterpoint’s fluidity of play, let me know in the comments or jump into the Discord and ask Matt for his advice!